The UNIRAC NXT installation manual provides a comprehensive guide for installing solar mounting systems, focusing on safety, efficiency, and compliance with industry standards. It outlines key features, system components, and step-by-step instructions to ensure a successful installation process.
Overview of the UNIRAC NXT System
The UNIRAC NXT system is a UL 3741-certified, open-channel solar mounting solution designed for pitched roofs. It offers a lightweight, durable, and easy-to-install framework for residential and commercial applications. The system features a modular design, allowing for flexibility in installation layouts, and is compatible with various solar panels. Its open-channel structure simplifies rail splicing and module connections, while the Stronghold Attachment with butyl sealing ensures a secure and weather-tight installation. The NXT system is engineered for optimal performance, safety, and compliance with industry standards, making it a reliable choice for solar installations.
Key Features and Benefits of the NXT UMOUNT System
The NXT UMOUNT system offers enhanced strength-to-weight ratios, making it both durable and lightweight. Its open-channel design simplifies installation, allowing for easier rail splicing and module connections. The system features a thermal break, reducing heat transfer and enhancing structural integrity. The Stronghold Attachment with butyl pads ensures a secure, weather-tight seal. Compliance with UL 3741 and NEC standards ensures safety and reliability. Modular components and compatibility with various solar panels make it versatile for different applications. These features collectively provide a cost-effective, efficient, and safe mounting solution for solar installations, backed by Unirac’s proven track record of quality.

System Components and Tools Required
The NXT UMOUNT system includes rails, splices, and Stronghold attachments with butyl pads. Essential tools like torque wrenches, drills, and sealant guns are necessary for installation.
NXT UMOUNT Rail Components
The NXT UMOUNT rail components are designed for durability and ease of installation. They include high-strength aluminum rails, splices, and end clamps. These rails are lightweight yet robust, ensuring a secure mounting structure for solar panels. The open-channel design allows for flexibility and compatibility with various roof types. Each rail component is precision-engineered to meet industry standards, ensuring a stable and reliable solar array installation. Proper assembly and alignment of these components are critical for system performance and longevity.
Stronghold Attachment and Butyl Installation Components
The Stronghold attachment and Butyl installation components are integral to securing the NXT UMOUNT system. The Stronghold attachment provides a durable connection to the roof structure, while the Butyl pads ensure a watertight seal. These components are designed for long-lasting performance and are compatible with various roofing materials. Proper installation, including torque specifications and alignment, is essential for system integrity. The Butyl pads must be handled and placed correctly to maintain their sealing properties and prevent installation errors. Refer to the manual for specific guidelines on using these components effectively.
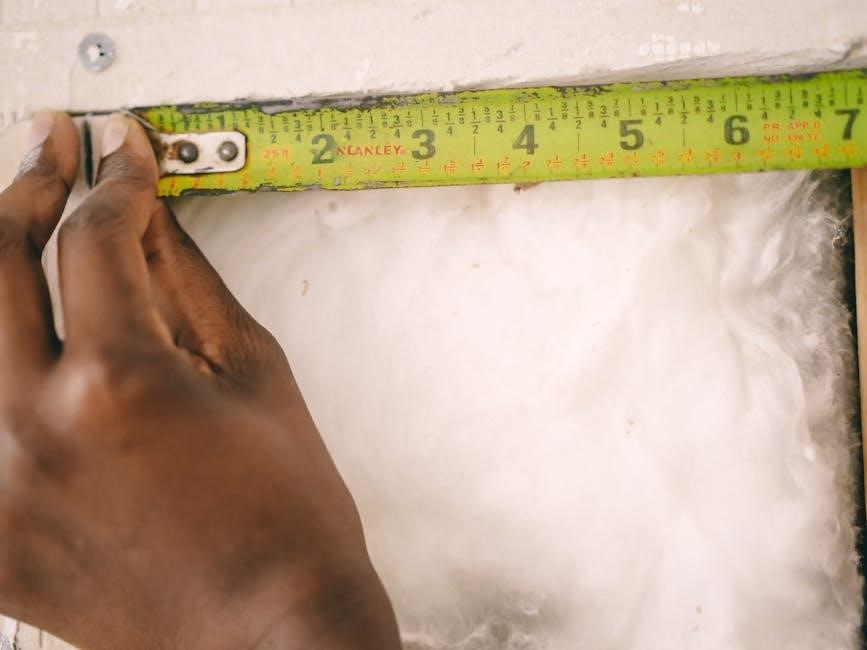
Essential Tools for Installation
The installation of the UNIRAC NXT UMOUNT system requires specific tools to ensure accuracy and safety. A torque wrench is crucial for achieving the recommended 20 ft-lbs torque value. A level tool is necessary to ensure proper alignment of rails and attachments. Measuring tools, such as a tape measure, are essential for marking positions accurately. Safety equipment like gloves and safety glasses should always be used. Additionally, a wrench set, drill, and utility knife for cutting butyl pads are necessary. Proper use of these tools ensures a secure and efficient installation process, adhering to the manual’s guidelines.

Pre-Installation Planning and Preparation
Proper planning ensures a smooth installation process. Assess roof structure, layout, and local codes to meet compliance requirements and optimize system performance efficiently.
System Layout and Design Considerations
Proper system layout is critical for optimal performance and structural integrity. Rails can be installed parallel or perpendicular to rafters, ensuring alignment with roof geometry. Use NXT UMOUNT rails as straight edges for precise layouts. Center the installation area over structural members to distribute weight evenly. Refer to the Unirac NXT D&E Guide and U-Builder for rail spans and cantilevers. Ensure adequate space for safe movement during installation. Modules should overhang rails symmetrically for balanced loading. Plan for compliance with local building codes and manufacturer specifications to avoid design flaws.
Roof Preparation and Structural Considerations
Ensure the roof is structurally sound and clear of debris before installation. Verify rafter locations and deck condition to avoid weak spots. Use lag screws for secure attachment, ensuring proper spacing and alignment. Apply butyl pads correctly to prevent leaks and ensure a tight seal. Check for compatibility with roof types, such as asphalt shingle or metal, and follow specific guidelines. Verify all structural elements can support the system’s weight. Proper preparation ensures a stable and durable installation, adhering to safety and manufacturer recommendations.
Compliance with Local Building Codes and Regulations
Ensure the installation meets all local building codes and regulations, including those related to structural integrity and electrical systems. Verify compliance with NEC standards and UL certifications, such as UL 3741 for photovoltaic systems. Obtain necessary permits and inspections to guarantee adherence to local requirements. Familiarize yourself with specific regional guidelines, as they may supersede manual instructions. Proper documentation and adherence to these standards are crucial for a safe and legally compliant installation, protecting both the installer and system owner from potential liabilities.
Step-by-Step Installation Process
The manual guides installers through mounting NXT UMOUNT rails, securing Stronghold attachments with butyl, and installing solar modules. Follow detailed instructions for each component to ensure compliance and proper system setup.
Mounting the NXT UMOUNT Rails
Position the NXT UMOUNT rails either perpendicular or parallel to the rafters, ensuring proper alignment and spacing. Use the rails as straight edges for accurate layouts. Center the installation area over structural members for optimal support. Ensure enough space around the array for safe movement during installation. Mark the roof attachment points according to the manufacturer’s guidelines. Secure the rails using lag screws, ensuring compliance with torque specifications (20 ft-lbs). Follow the manual’s instructions for rail splices and cantilevers, adhering to local building codes and manufacturer recommendations for a secure and code-compliant installation.
Securing the Stronghold Attachment with Butyl
Place the butyl pad on the roof, ensuring it aligns with the pre-marked attachment points. Position the Stronghold Attachment over the butyl pad and hand-tighten the set screw. Tighten the screw to the specified torque of 20 ft-lbs to create a secure seal. Ensure the butyl pad does not overhang the roof or attachment area. Follow the manufacturer’s instructions for applying additional butyl pads if required. Properly securing the Stronghold Attachment with butyl ensures a watertight seal and a stable base for the solar mounting system, adhering to safety and structural integrity standards.
Installing Modules and Connecting Components
Mount the solar modules onto the NXT UMOUNT Rails, ensuring they are centered and evenly spaced. Secure each module using the provided clamps, tightening the bolts to the recommended torque. Connect the modules in series or parallel according to the system design. Attach the necessary electrical connectors and grounding components, following the manufacturer’s guidelines. Double-check all connections for tightness and proper alignment. Modules should overhang the rails symmetrically to maintain structural integrity and optimize performance. Ensure all components are securely fastened to withstand environmental conditions and meet local building codes. Proper installation ensures system efficiency and longevity.
Best Practices for a Safe and Efficient Installation
Adhere to manufacturer guidelines, ensure proper torque values, and handle components with care to avoid damage. Conduct regular inspections and follow safety protocols to optimize efficiency and safety.
Ensuring Proper Torque and Tightening Sequences
Proper torque and tightening sequences are critical for ensuring the structural integrity and safety of the UNIRAC NXT installation. Always use a torque wrench calibrated to the specified values, typically 20 ft-lbs for most bolts. Follow the recommended tightening sequence outlined in the manual to avoid uneven stress on components. Over-tightening can damage hardware, while under-tightening may lead to system instability; Refer to the installation guide for specific torque values and sequences for each component, such as rail clamps and roof attachments. Ensure all connections are secure and inspect regularly to maintain system reliability and compliance with safety standards.
Handling and Placement of Butyl Pads
Butyl pads are essential for sealing and securing components in the UNIRAC NXT system. Always handle them with clean, dry gloves to prevent contamination. Place butyl pads evenly around the Stronghold attachment, ensuring full contact with the roof surface. For larger gaps, additional pads may be required, as specified in the manual. Avoid stretching or deforming the pads during installation. Proper placement ensures a watertight seal and maintains the system’s structural integrity. Refer to the manual for torque specifications, typically 20 ft-lbs, to prevent over-tightening, which can damage the pads or surrounding materials. This step is crucial for long-term durability and performance.
Final System Inspection and Testing
After completing the installation, perform a thorough inspection to ensure all components are securely fastened and aligned. Verify that all bolts are torqued to the specified 20 ft-lbs to prevent loosening over time. Check that modules are evenly spaced and properly secured to the rails. Inspect butyl pads for proper sealing and alignment, ensuring no gaps or misplacements. Test the system’s electrical connections to confirm proper grounding and functionality. Visually verify that all rails, splices, and attachments are correctly installed and tightened; Document the inspection results and ensure compliance with local building codes before final approval.
Troubleshooting Common Installation Issues
Troubleshooting installation issues involves correcting alignment and leveling problems, resolving butyl application errors, and addressing rail splice connections to ensure system stability and compliance.
Addressing Alignment and Leveling Problems
Alignment and leveling issues can arise during UNIRAC NXT installation. Check rail placement using a straight edge or laser level to ensure proper alignment. Verify that rails are evenly spaced and securely fastened. If misalignment occurs, re-measure and adjust the rail positions. Ensure the system is centered over structural members for stability. Tighten bolts according to the specified torque value (20 ft-lbs) to prevent unevenness. If issues persist, consult the installation manual or contact Unirac support for further guidance to achieve a secure and balanced setup.
Resolving Butyl Installation Errors
Butyl installation errors can compromise the system’s integrity. Ensure proper placement of butyl pads between the Stronghold attachment and roof deck for a watertight seal. Avoid over-tightening, as this may cause uneven compression. If butyl pads are incorrectly positioned, remove them and reapply following the manual’s guidelines. Clean surfaces before reinstallation to ensure optimal adhesion. Refer to the UNIRAC NXT UMOUNT manual for torque specifications and butyl application best practices. If issues persist, contact Unirac support for assistance to prevent leaks and ensure a secure connection.
Fixing Rail Splice and Connection Issues
Rail splices and connections are critical for system stability. If misaligned, realign rails ensuring flush surfaces and secure with bolts as per torque specifications. Tighten all connections evenly to avoid uneven stress. Inspect for any gaps or loose hardware. If splices are not fitting properly, check for debris or damage. Clean and reassemble, ensuring bolts are tightened in the correct sequence. Refer to the UNIRAC NXT UMOUNT manual for detailed instructions. Addressing these issues promptly prevents structural weaknesses and ensures a safe, efficient installation. Regular inspection post-installation is recommended to maintain system integrity.
After completing the installation, conduct a thorough inspection to ensure all components are secure and compliant with local codes. Document the process for future reference and verify system integrity to guarantee optimal performance and safety.
Reviewing the Installation for Compliance
Ensure the installation adheres to local building codes and regulations. Verify that all structural attachments and electrical connections meet UL and NEC standards. Check torque specifications for bolts and confirm proper use of butyl pads for weatherproofing. Review the system layout to ensure compliance with rail spans and cantilevers specified in the manual. Document all compliance checks for permitting and future reference. Ensure the PV system is grounded correctly, following the manufacturer’s guidelines for safety and efficiency.
Documenting the Installation Process
Thoroughly document each step of the installation process for future reference and compliance. Take photos of key components, such as rail splices, butyl pad placements, and torque specifications. Record all torque values applied during securing bolts and connections. Maintain a detailed log of compliance checks, including structural integrity and electrical grounding. Include a final inspection report confirming the system meets local building codes. Store all documentation securely, as it may be required for permitting or maintenance purposes. Refer to the manual for specific documentation templates or guidelines to ensure accuracy and completeness.