Welcome to the instruction manual for old Singer sewing machines! This guide provides essential information for understanding‚ maintaining‚ and troubleshooting your vintage machine‚ ensuring optimal performance and longevity.
1.1 Historical Significance of Singer Sewing Machines
Singer sewing machines hold a prominent place in history‚ revolutionizing clothing production and homemaking since their introduction in the mid-19th century. The first practical sewing machine‚ patented in 1851‚ transformed industries and domestic life‚ enabling mass production of garments and empowering individuals‚ especially women‚ with newfound creativity and efficiency. Over time‚ Singer machines became synonymous with durability and innovation‚ making them highly collectible and cherished by enthusiasts today. Their timeless appeal continues to inspire sewers worldwide.
1.2 Importance of Having an Instruction Manual
An instruction manual is crucial for understanding and optimizing the use of your vintage Singer sewing machine. It provides step-by-step guides for threading‚ maintaining‚ and troubleshooting‚ ensuring smooth operation. Without a manual‚ users may struggle with proper setup‚ such as thread tension and bobbin winding‚ leading to suboptimal performance. Manuals also offer insights into stitch types‚ fabric compatibility‚ and care routines‚ helping preserve the machine’s longevity and functionality. Having one is essential for both beginners and experienced sewers to unlock the machine’s full potential.

Understanding Your Vintage Singer Sewing Machine
Understanding your vintage Singer sewing machine involves familiarizing yourself with its components‚ functions‚ and unique features. This knowledge helps in optimizing its performance and longevity‚ ensuring smooth sewing experiences.
2.1 Identifying Key Parts and Components
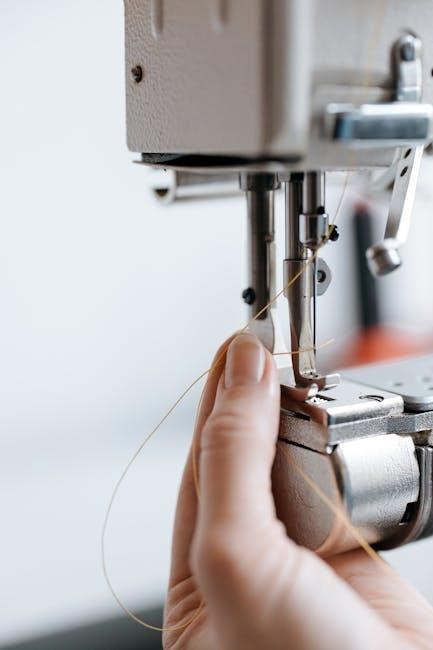
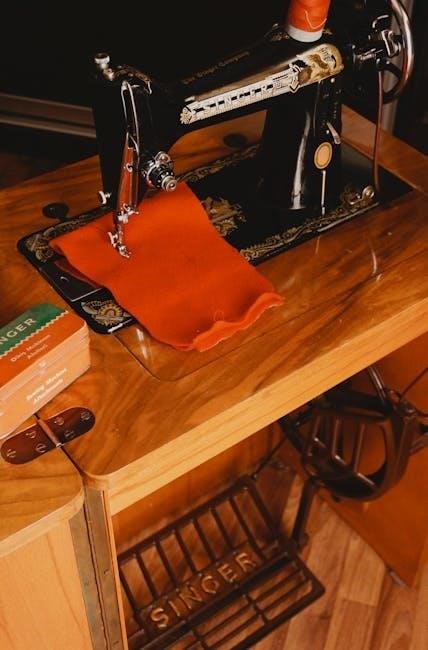
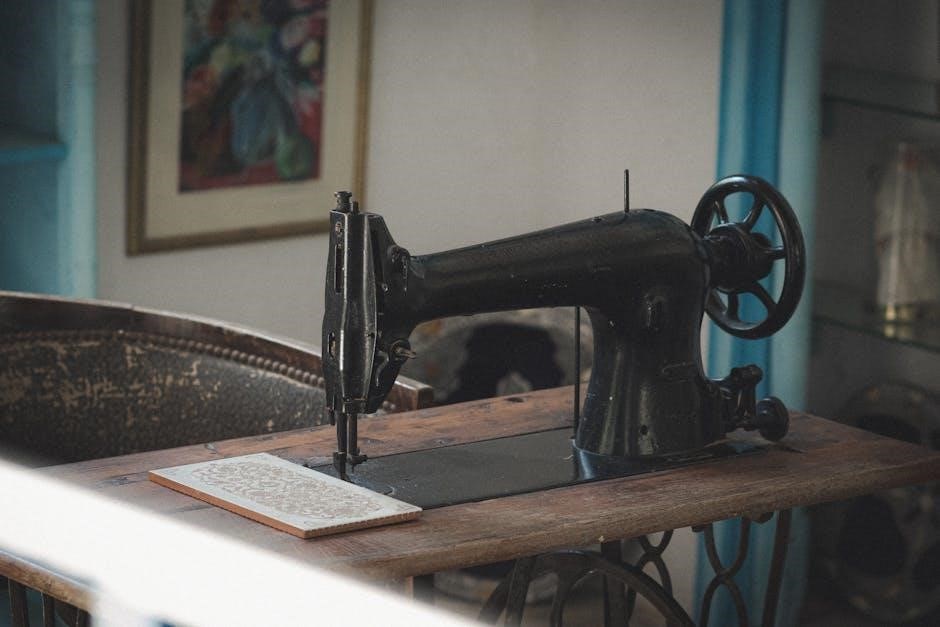
Familiarizing yourself with the key parts of your vintage Singer sewing machine is essential for optimal use. The spool pins hold the thread‚ while the bobbin manages the underside stitching. The tension discs regulate thread tightness‚ and the presser foot lifts to allow fabric movement. The take-up lever controls thread flow‚ ensuring even stitching. Understanding these components helps in threading‚ adjusting‚ and troubleshooting‚ making your sewing experience more efficient and enjoyable. Proper identification ensures you can maintain and operate your machine effectively.
2.2 Familiarizing Yourself with Stitch Types and Functions
Understanding the stitch types and functions on your vintage Singer sewing machine enhances your sewing experience. The straight stitch is ideal for basic sewing‚ while the backstitch reinforces seams. Adjusting the stitch length and width‚ typically via levers‚ allows customization for different fabrics. Familiarize yourself with the zigzag stitch for stretchy materials and decorative stitching options. Experimenting with these settings ensures proper fabric handling and professional-looking results. Refer to your manual for model-specific stitch capabilities and adjustments.
Threading and Setting Up Your Machine
Threading your vintage Singer sewing machine involves carefully guiding the top thread and bobbin through specific channels. Follow the manual’s step-by-step guide to ensure proper setup for smooth operation.
3.1 Threading the Top Thread: Step-by-Step Guide
Locate the spool pin and thread take-up lever. Insert the thread through the guides‚ starting from the spool pin‚ then through the tension discs. Leave a small loop at the tension discs before guiding the thread through the take-up lever and needle bar. Pull gently to seat the thread in the machine. Ensure the thread is not too tight or loose. Test by pulling the thread to confirm smooth movement. Always refer to your manual for specific model instructions.
3.2 Winding and Inserting the Bobbin
Cut a piece of thread and place it through the bobbin winder guide. Wind the thread around the bobbin‚ keeping it tight and even. Once full‚ cut the thread and remove the bobbin from the winder. Insert the bobbin into the bobbin case‚ ensuring it sits correctly. Pull the thread gently to seat it in the machine. Make sure the bobbin is properly aligned and the thread tension is adjusted for smooth sewing. Always follow the manual for specific guidance.
Maintenance and Care for Your Singer Sewing Machine
Regular cleaning and oiling are essential to keep your Singer sewing machine running smoothly. Always use recommended oils and avoid harsh chemicals to preserve its functionality and longevity.
4.1 Cleaning the Machine: Essential Tips
Cleaning your vintage Singer sewing machine is crucial for maintaining its performance and longevity. Use a soft brush or cotton swab to remove dust‚ lint‚ and debris from the bobbin area‚ tension discs‚ and stitch plate. Avoid harsh chemicals; instead‚ gently wipe surfaces with a dry cloth. Regularly oiling after cleaning ensures smooth operation. For intricate parts‚ refer to your machine’s manual for specific guidance. Keeping your machine clean prevents jamming and ensures consistent stitching quality over time.
4.2 Oiling the Machine for Smooth Operation
Oiling is vital for maintaining your vintage Singer sewing machine’s smooth operation. Use high-quality sewing machine oil‚ applying a few drops to moving parts like the bobbin area‚ tension discs‚ and gears. Avoid over-oiling to prevent attracting dust. Regular lubrication ensures parts glide effortlessly‚ reducing friction and wear. Refer to your manual for specific oiling points. Proper oiling keeps your machine running quietly and efficiently‚ preventing rust and extending its lifespan. Oil after cleaning for optimal results.
Troubleshooting Common Issues
This section helps identify and resolve common problems with your vintage Singer sewing machine‚ such as thread tension issues or jamming‚ ensuring smooth operation and extending its lifespan.
5.1 Solving Thread Tension Problems
Thread tension issues are common in vintage Singer sewing machines. Check the take-up lever and bobbin area for proper alignment. Adjust the tension discs or bobbin case screws to balance the thread flow. Ensure the top thread is threaded correctly and not too tight or loose. If threads loop excessively‚ tighten the bobbin tension or re-thread the machine. Regularly clean lint from the tension springs to maintain even stitches. Proper tension ensures smooth sewing and prevents fabric puckering or uneven stitching.
5.2 Addressing Jamming or Skipping Stitches
Jamming or skipping stitches can occur due to lint buildup‚ incorrect thread tension‚ or misaligned parts. Regularly clean the bobbin area and feed dogs to remove debris. Ensure the bobbin is properly seated and the top thread is threaded correctly. If stitches skip‚ check the needle for damage or incorrect installation. Oiling the machine and adjusting the stitch length can also resolve issues. Proper maintenance and consistent thread flow will help prevent these common problems and ensure smooth stitching.

Finding and Using the Right Manual
Locate your Singer machine’s serial number to identify its model and production year. Use this information to download the correct manual from trusted sources like ManualsLib or Singer’s official website.
6.1 How to Locate Your Machine’s Serial Number
To find your Singer sewing machine’s serial number‚ check the base‚ back‚ or underside of the machine. On newer models‚ it’s often near the power switch. For older machines‚ it may be engraved on the metal body or stamped on a small plaque. Use a flashlight for better visibility. Once located‚ record the serial number to access the correct manual or support resources. This identifier is essential for downloading the right manual online or contacting Singer support.
6.2 Downloading or Accessing Free Manuals Online
To access free manuals for your vintage Singer sewing machine‚ visit websites like MakeUseOf or archive.org‚ which host a wide range of sewing machine manuals. Singer’s official website also offers free PDF downloads for various models. Use your machine’s serial number to find the exact manual. If unavailable‚ check for similar models or reach out to sewing communities for assistance. These resources often include setup guides‚ maintenance tips‚ and troubleshooting sections to help you operate your machine effectively.

Tips for Optimal Use of Your Vintage Singer Machine
For best results‚ use high-quality fabric and needles suitable for your project. Adjust stitch length and width based on fabric type. Regularly clean and oil the machine for smooth operation. Refer to your manual for specific settings and maintenance tips to ensure longevity and optimal performance.
7.1 Choosing the Right Fabric and Needles
Selecting the appropriate fabric and needles is crucial for optimal performance. Use cotton‚ linen‚ or silk for general sewing‚ while heavier fabrics like denim or canvas may require specialized needles. Sharp needles are ideal for delicate fabrics‚ while heavy-duty needles work best for thick materials. Always match the needle type to your fabric to ensure smooth stitching and prevent damage to your machine. Using the wrong needle can lead to poor stitch quality or machine jamming‚ so choose wisely for your projects.
7.2 Adjusting Stitch Length and Width for Different Fabrics
Properly adjusting stitch length and width ensures optimal results for various fabrics. For delicate fabrics‚ use shorter stitch lengths (2-3 mm) and narrower widths. Medium-weight fabrics like cotton work best with standard settings (3-4 mm length‚ medium width). Heavy-duty fabrics require longer stitches (4-5 mm) and wider settings. Always test adjustments on scrap fabric first to achieve the desired seam quality. This ensures your vintage Singer machine performs flawlessly across all materials.
Mastering your vintage Singer sewing machine involves understanding its mechanics‚ proper care‚ and optimal use. Regular maintenance and correct threading ensure smooth operation and lasting performance. Enjoy sewing with a timeless classic‚ empowered by the knowledge from this manual.
8.1 Summary of Key Takeaways
Understanding and maintaining your vintage Singer sewing machine requires attention to threading‚ bobbin setup‚ and regular cleaning. Proper oiling ensures smooth operation‚ while addressing thread tension and stitch issues prevents downtime. Familiarizing yourself with stitch types and fabric compatibility enhances sewing results. Referencing the instruction manual is crucial for troubleshooting and optimal performance. By following these guidelines‚ you can preserve your vintage Singer sewing machine and enjoy reliable‚ high-quality stitching for years to come.
8.2 Encouragement to Explore Further Resources
Exploring further resources can deepen your understanding and enhance your sewing experience. Websites like MakeUseOf and Singer’s official site offer free manuals‚ tutorials‚ and troubleshooting guides. Platforms like archive.org provide vintage manuals‚ while communities and forums share tips and tricks. Embrace these resources to unlock your machine’s full potential and stay connected with fellow sewing enthusiasts‚ ensuring your vintage Singer remains a trusted companion for years of creative projects.