The Honeywell RTH6360D1002 is a 5-2 day programmable thermostat designed for efficient temperature control in residential spaces. It offers advanced features for heating and cooling systems, ensuring energy efficiency and comfort. This user-friendly device allows homeowners to program temperature settings automatically, optimizing energy use and reducing costs. Its sleek design and intuitive interface make it a popular choice for modern home automation.
1.1 Overview of the Thermostat and Its Features
The Honeywell RTH6360D1002 is a 5-2 day programmable thermostat with a backlit display, offering precise temperature control for heating and cooling systems. It features automatic system mode, energy-saving programming, and compatibility with various HVAC systems. The thermostat includes advanced settings for fan operation, system changeover, and stage heating or cooling. Its intuitive design ensures easy navigation and customization for optimal comfort and efficiency.
- 5-2 day programmable scheduling
- Backlit display for easy readability
- Automatic system mode for heating and cooling
- Energy-efficient temperature control
- Compatibility with multiple HVAC configurations
1.2 Importance of the Installation Manual
The installation manual for the Honeywell RTH6360D1002 is essential for ensuring proper setup and functionality. It provides step-by-step instructions, safety guidelines, and troubleshooting tips, helping users avoid common mistakes. The manual also explains how to access advanced features and configure settings for optimal performance, making it a crucial resource for both novice and experienced users.
- Ensures safe and correct installation
- Guides users through advanced configuration
- Helps troubleshoot common issues
- Maximizes energy efficiency and system performance
Product Specifications
The Honeywell RTH6360D1002 is a 5-2 day programmable thermostat with advanced temperature control. It supports dual fuel systems, requires 2 AA batteries, and features a backlit display for easy readability. Compatible with most HVAC systems, it ensures efficient heating and cooling management. The thermostat is designed for easy installation and user-friendly operation.
2.1 Technical Details of the RTH6360D1002
The Honeywell RTH6360D1002 operates on 2 AA alkaline batteries, ensuring reliable performance. It features a backlit display for enhanced visibility and supports dual fuel systems. The thermostat is compatible with most HVAC systems, including heat pumps and dual-stage heating/cooling. Its programmable interface allows for precise temperature control, optimizing energy efficiency. The device is designed for easy installation and user-friendly operation.
2.2 Compatibility with Heating and Cooling Systems
The Honeywell RTH6360D1002 is compatible with most heating and cooling systems, including gas, electric, and heat pumps. It supports dual-fuel and dual-stage systems, ensuring efficient operation. The thermostat works seamlessly with standard HVAC setups, making it a versatile choice for various home configurations. Its universal design allows for easy integration with existing systems without the need for additional equipment.
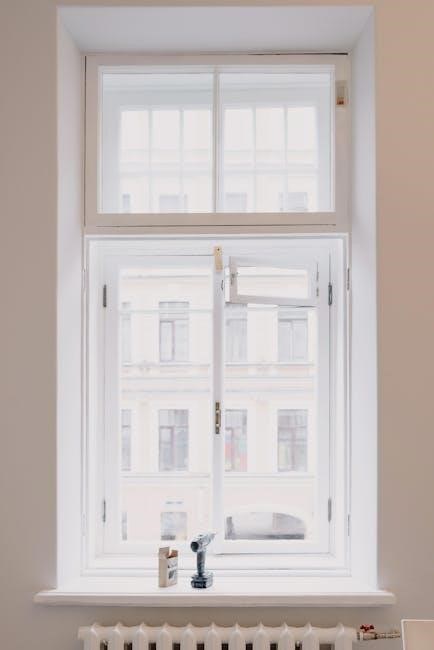
Pre-Installation Steps
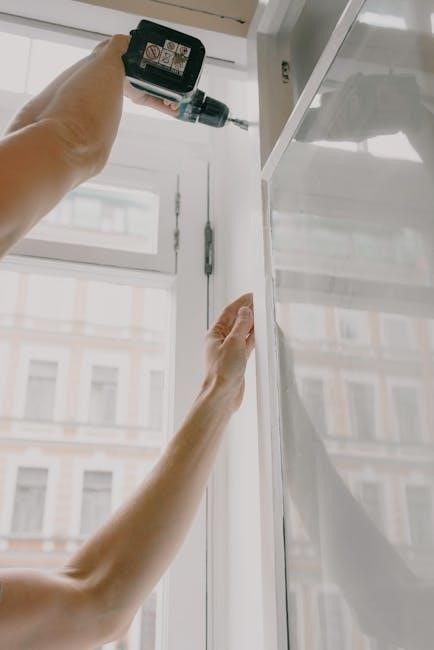
Gather tools like a Phillips screwdriver, level, and wire stripper. Ensure you understand the wiring system and compatibility with your HVAC setup before proceeding.
3.1 Tools and Materials Required
- Phillips screwdriver and small flat head screwdriver
- Level, pencil, and wire stripper
- Needle-nose pliers and drill with 7/32-inch bit
- Screws, anchors, and UWP mounting system
- Two AA alkaline batteries for the thermostat
3.2 Understanding the Thermostat Wiring System
Understanding the wiring system is crucial for proper installation. The Honeywell RTH6360D1002 uses a standard wiring configuration with terminals like R, W, Y, G, and C. Ensure the wires are correctly connected to their respective terminals to avoid malfunctions. Align the thermostat with the UWP mounting system and secure it firmly using the provided screws. Proper wiring ensures seamless operation of heating, cooling, and power functions.

Installation Process
The installation involves turning off power, removing the old thermostat, attaching the UWP, inserting batteries, aligning and securing the thermostat, connecting wires, closing the door, and restoring power. Follow the manual for accurate setup.
4.1 Mounting the Thermostat and UWP System
Mounting the Honeywell RTH6360D1002 involves securing the Universal Wall Plate (UWP) to the wall using provided screws. Align the thermostat with the UWP, ensuring a flush fit. Insert two AA batteries into the thermostat and attach it to the UWP. Tighten the screws for a secure installation. This step ensures proper functionality and a sleek appearance. Follow the manual for precise alignment.
4.2 Connecting the Wires and Securing the Thermostat
Connect the wires to the appropriate terminals on the UWP, ensuring correct labeling. Secure the thermostat to the UWP using the provided screws. Tighten firmly for a stable installation. Turn on the power and test the system to ensure proper functionality. Always follow safety guidelines when handling electrical connections to avoid hazards.
Advanced Features and Configuration
The Honeywell RTH6360D1002 offers advanced features like automatic system mode and energy-saving settings, ensuring optimal temperature control. Its intuitive interface allows for easy customization of heating and cooling preferences, enhancing comfort and efficiency year-round.
5.1 Accessing the System Configuration Menu
To access the system configuration menu on your Honeywell RTH6360D1002 thermostat, press and hold the Menu and Down buttons simultaneously for about 5 seconds. This will open the Advanced Setup Menu. Use the Up or Down buttons to navigate through options and the Select button to choose settings. This menu allows you to customize system parameters for optimal performance and energy efficiency.
5.2 Setting Up Automatic System Mode
Enable automatic system mode by accessing the system configuration menu and turning the feature ON. This allows the thermostat to automatically control both heating and cooling systems to maintain your desired temperature. Turn the feature OFF if you prefer manual control. Refer to the manual for detailed steps to configure this setting for optimal performance and energy efficiency.
Programming the Thermostat
Program the RTH6360D1002 to create temperature schedules, optimizing comfort and energy savings. Adjust settings to customize heating and cooling cycles, ensuring efficiency and convenience for your home.
6.1 Creating a Temperature Schedule
To create a temperature schedule on the RTH6360D1002, press the Menu button and select the program option. Choose the desired day(s) and set the time and temperature for each period. Use the up or down arrows to adjust settings, ensuring energy efficiency and comfort. Save changes to activate the schedule, optimizing your home’s heating and cooling system for different times of the day.
6.2 Adjusting Program Schedules for Efficiency
Navigate to the Menu, select the program option, and choose the desired day(s). Use the up/down arrows to adjust time and temperature settings for each period. Set temperatures lower when sleeping or away and higher when home. Consider copying schedules to multiple days for convenience. Avoid using the Hold feature permanently. Review and save changes to optimize energy efficiency and comfort.

Troubleshooting Common Issues
Resolve blank displays by checking power and wiring connections. Address heating or cooling issues by verifying system compatibility and ensuring proper thermostat setup. Refer to the manual for detailed solutions.
7.1 Fixing a Blank Display on the Thermostat
A blank display on the Honeywell RTH6360D1002 thermostat can occur due to power issues or loose wiring. First, ensure the thermostat has working batteries or is properly connected to power. Check all wire connections for tightness and integrity. If the issue persists, restart the thermostat by removing and reinserting the batteries or resetting the power supply. Refer to the manual for additional troubleshooting steps to restore functionality and ensure accurate temperature control.
7.2 Resolving Heating or Cooling Control Problems
If the thermostat fails to control heating or cooling, ensure the automatic system mode is enabled. Verify wiring connections and system configuration settings. Check for proper power supply and reset the thermostat if necessary. Consult the manual for advanced troubleshooting steps, such as recalibrating the thermostat or restoring factory settings to resolve control issues effectively.
Energy Efficiency and Cost Savings
The Honeywell RTH6360D1002 promotes energy efficiency through programmable scheduling and automatic temperature adjustments, helping reduce consumption and lower energy bills while maintaining comfort.
8.1 How the Thermostat Helps Reduce Energy Consumption
The Honeywell RTH6360D1002 minimizes energy waste by allowing precise temperature control through programmable schedules. It automatically adjusts heating and cooling settings, optimizing energy use during peak and off-peak hours. By eliminating constant manual adjustments and maintaining consistent temperatures, it significantly reduces unnecessary energy consumption, leading to lower utility bills and a more eco-friendly home environment.
8.2 Using Advanced Features for Optimal Energy Use
The RTH6360D1002 offers advanced features like automatic system mode, which manages heating and cooling seamlessly; Programming schedules allows temperature adjustments during off-peak times, reducing energy waste. These features ensure efficient energy use, cutting costs and promoting eco-friendly living without compromising comfort. By leveraging these settings, users can maximize energy savings while maintaining optimal indoor conditions year-round.
Maintenance and Upkeep
Regular maintenance ensures optimal performance. Replace batteries annually, clean the thermostat with a soft cloth, and check for software updates to keep your device functioning efficiently.
9.1 Replacing Batteries and Cleaning the Thermostat
To maintain optimal performance, replace the AA alkaline batteries annually or when the display indicates low power. Ensure the thermostat is turned off before replacing batteries. Clean the device with a soft, dry cloth to remove dust and debris, avoiding harsh chemicals. Regular cleaning prevents malfunction and ensures accurate temperature readings, while fresh batteries guarantee uninterrupted operation and energy efficiency.
9.2 Updating Software and Firmware
To update the Honeywell RTH6360D1002 thermostat’s software and firmware, access the System Configuration Menu by pressing and holding the Menu and Select buttons. Check for available updates and follow on-screen instructions to download and install them. Ensure the thermostat is connected to a power source during the update to prevent interruptions. After installation, restart the device and verify proper functionality to ensure optimal performance and security. Regular updates maintain efficiency and resolve any potential issues.
Manufacturer Support and Resources
Honeywell provides comprehensive support, including the official manual, customer support contact, and online resources for troubleshooting and optimal thermostat performance. Visit their website for detailed assistance.
10.1 Accessing the Official Honeywell Manual
The official Honeywell RTH6360D1002 manual is available on Honeywell’s website. It provides detailed installation, programming, and troubleshooting guides. Users can download the PDF version for free, ensuring they have all the necessary information to operate the thermostat effectively. Additionally, the manual includes step-by-step instructions for advanced features and system configurations, making it an essential resource for optimal performance and energy efficiency.
10.2 Contacting Customer Support for Assistance
For assistance with the Honeywell RTH6360D1002, contact customer support via the official Honeywell website, phone, or email. Their team provides troubleshooting, technical help, and installation guidance. Visit the support page for contact details and resources. Honeywell’s customer support ensures reliable assistance for any thermostat-related queries, helping users resolve issues quickly and efficiently.
Safety Precautions
Ensure safe installation by following electrical guidelines, handling wires carefully, and avoiding common mistakes. Refer to the manual for detailed safety instructions and precautions.
11;1 Electrical Safety Guidelines
Always disconnect power before installation to avoid electrical shocks. Ensure proper handling of wires and connections. Use the correct voltage as specified in the manual. Avoid touching live wires and components. If unsure, consult a licensed electrician. Follow grounding instructions carefully to prevent hazards. These precautions ensure safe installation and operation of the thermostat.
11.2 Avoiding Common Installation Mistakes
Ensure proper wiring connections as per the manual to avoid system malfunctions. Always turn off power before starting installation to prevent electrical shocks. Verify thermostat leveling for accurate temperature readings. Avoid over-tightening screws, which can damage the device. Double-check the compatibility of the thermostat with your HVAC system. Following these steps ensures a safe and successful installation, optimizing performance and energy efficiency.
Successful installation ensures optimal performance and energy efficiency. Follow guidelines for a comfortable home environment and long-term cost savings with your Honeywell RTH6360D1002 thermostat.
12.1 Summary of Key Installation Steps
Turn off power to your HVAC system. Remove the old thermostat and prepare the UWP system. Mount the thermostat base securely, aligning it properly. Connect wires carefully, ensuring correct terminal assignments. Secure the thermostat to the base and insert batteries. Test the system to ensure proper operation. Always follow the manual for specific guidelines and manufacturer recommendations to ensure safety and optimal performance.
12.2 Final Tips for Optimal Thermostat Performance
Regularly maintain your thermostat by cleaning the display and checking battery levels. Ensure proper programming of temperature schedules to maximize energy efficiency. Keep the thermostat away from direct sunlight and heat sources. Schedule annual HVAC system maintenance to ensure compatibility. Update software periodically for improved functionality. Always follow the manufacturer’s guidelines for troubleshooting and adjustments to maintain optimal performance and longevity of the device.